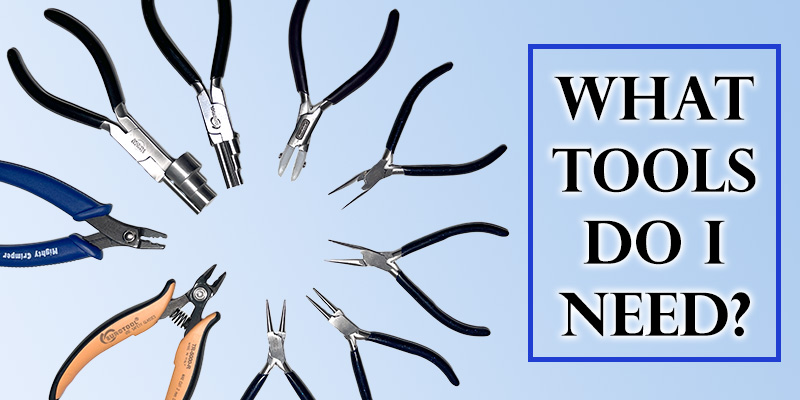
When you’re new to jewelry making figuring out which tools to buy can be an overwhelming task.
There are tools for wire work, stringing, and a multitude of tools for more advanced techniques, you might wonder where to start.
In this article I’ll cover, in order of importance, the pliers you need to get started and for which techniques they’re used. I’m not going to cover more advanced techniques, like silversmithing and stone setting, I’ll keep this to simple wire work and beading. But don’t fret, you can make some absolutely beautiful jewelry without the advanced knowledge.
Must Haves
Chain Nose Pliers
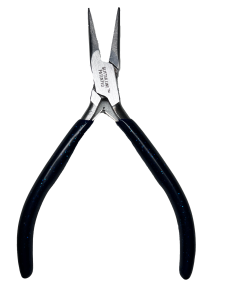
It doesn’t matter what you’re making, there is one tool you must have, and that’s chain nose pliers or sometimes called needle nose pliers. These pliers have tapered barrel with a flat edge to the insider where the item you’re holding goes.
You will need two pairs or you can use one like the pair pictured on the left and a second that has curved barrels. These are called bent chain nose or bent needle nose pliers. The curved ones are handy because they allow you to grab things in a different way when the straight ones are awkward.
They come in all sizes and weights, I like the lightweight, slim ones as they are easier to maneuver and get into small places.
The pair I use most were pretty inexpensive but I don’t remember where I purchased them. some people may say don’t buy the cheapest but in this case it worked for me. I’ve had these pliers for many years and if they broke, I would replace with another pair just like them just because of the weight and slim profile.
Flush Wire Cutters
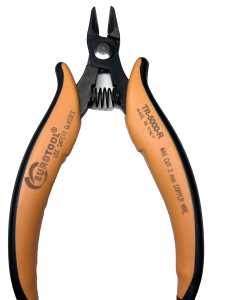
I use flush wire cutters for just about every project. Even when I’m beading I use them to cut the beading wire.
Flush cutters have one side that is flat and makes a straight clean cut. A clean straight cut is super important when making jewelry. If you leave a bur on the end of a wire it could scratch you or your customer. It could even draw blood. So a good sharp pair of wire cutters is important.
In the case of your wire cutters I wouldn’t buy the cheapest but do look for something that fits your hand well. As time goes on and you decide to make a lot of jewelry, you may want to buy multiple pairs, one for heavy wire, a medium size, and a smaller, finer tipped pair.
Wire cutters last a long time so don’t be afraid to spend a little more. I would start with just one pair of the medium size. Since the cutting edge can be sharpened there should be no need to replace them for quite a while.
As this blog grows I will make a post on how to sharpen them so you can keep yours making a nice clean cut.
Round Nose Pliers
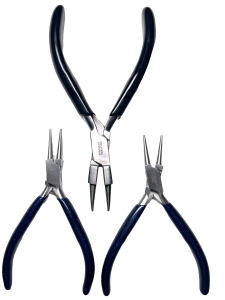
Round nose pliers are used to make loops and curves with wire. Even if you plan to just string beads for necklaces, you will eventually need a pair of round nose pliers if you decide to make a pendant or a chain. And if you want to make earrings, they are a must, so I include them in my “must have” section.
As you can see in my photo, I have have three pair. Each is a different size allowing me to make loops of all sizes. Again, just like with the chain nose pliers, I chose the slim lightweight pliers. Definitely choose the size and weight that’s most comfortable for your hands.
I was perusing Amazon the other day and saw a pair that not only had measurement engraved in the barrel (which will help you use the same place each time you make a loop) but on barrel was larger than the other giving you the ability to make more sizes. Interesting. I haven’t tried them for the price it might be less expensive than buying multiple pair.
If you’re just starting out and not sure if you will like making jewelry, just buy a medium size and just it for everything. Expand later.
Tools for Stringing Beads
Crimping Pliers
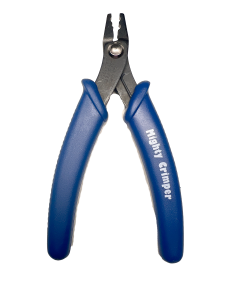
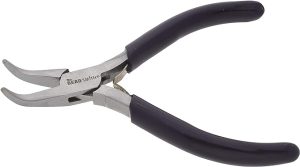
In addition to the ‘must haves’ above, there’s at least one other tool you’ll need to string beads whether it’s a bracelet or a necklace and that’s crimping pliers.
When you use stringing wire to make a beaded necklace, you’ll need a way to attach a closure of some sort. That’s where the crimping pliers are needed.
On the ends of your strand you will place a crimp bead, it’s like a little tube. First you add the crimp bead, then you add your closure, let’s say you’re using a lobster claw closure (most people are familiar with this type of closure, it kind of looks like a lobster claw). Then you loop the wire back through the crimp bead and crimp it closed, basically crushing and bending it so the wire doesn’t come out.
This makes a little loop where your lobster claw can hang but it won’t come off. You will also add a ring to the other end of the bead string in the same manner. I’ll give you a tutorial later, for now we’ll just talk about the pliers you need in order to do the crimp.
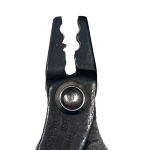
If you look at the close-up photo (you can click the image to make it bigger), you’ll see it has an area with a notch on one side and a round area on the other. This will crush the crimp bead in the middle making it easy to bend in half. You then use the rounded area at the top of the pliers to bend the crimp bead over itself.
Don’t worry, it’s tiny and not really noticeable but if you hate the way it looks, no problem, you can cover it with a crimp cover. You used this tool to put that on as well.
Tools for Simple Wirework
Nylon Jaw Pliers
Nylon Jaw Pliers are used to straighten wire. The nylon doesn’t scratch like the metal on normal pliers. You can put the wire in the jaw and pull to the end and it straightens as you pull.
These work especially well with the thinner wires, the kind used to wire on beads or weave to fill in an area. But I use it for the thicker wire as well. It’s a lot harder to straighten the thicker wire but these pliers do help.
The nylon jaws are replaceable. As you might be able to see if you expand my photo, mine need to be replaced soon and they are really beat up with lots of gouges and indentions.
Bail Making Pliers
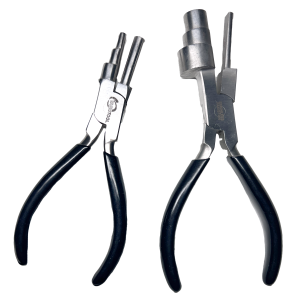
The last tool I’ll cover are bail making pliers or, as some would call it, loop making pliers.
These pliers come in multiple sizes. As you can see, mine have three sized on one barrel. And each plier has different sizes, one larger than the other.
I’ve seen pliers on Amazon that have three different sizes on each barrel giving you six sizes on one tool. They’re called 6-step or 6-in-one loop making pliers.
I use the large barrel on my smaller plier to make earring hooks. the larger one is use for a multitude of things including making pendants. These are a great tool to have on your bench.
So that concludes my list of pliers that you need when you first start exploring jewelry making. Remember to keep it simple at first and don’t spend a fortune. You don’t even need to buy all these tools when you first start, just the ‘must haves’ I’ve listed above. You need to make sure you like to make jewelry.
Also, don’t give up too quickly if you don’t like the results you get at first. Manipulating wire, matching colors for beads, and making pretty jewelry takes practice. Be sure to keep working at it, you will be get better with more practice.
Leave a Reply